All About Substance 3D Painter: What It Is and Why It's Needed
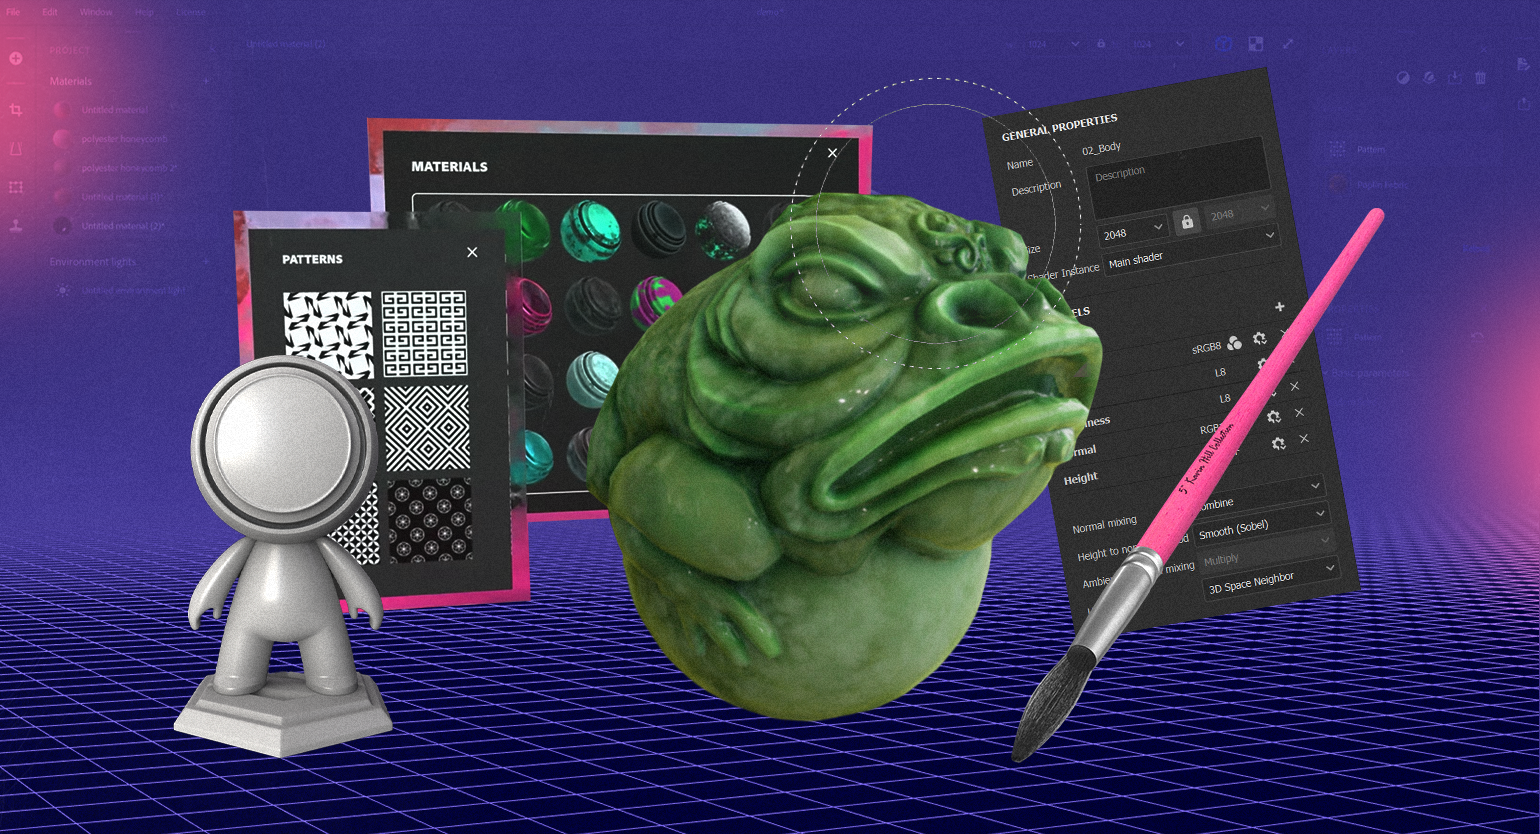
When there's a need to create high-quality and unique textures for 3D models in a short amount of time, artists often turn to Adobe's Substance 3D Painter. This program has long established itself in the field of 3D graphics, allowing specialists to bring the most unusual concepts in texturing to life.
What is Substance 3D Painter and Why is it Needed?
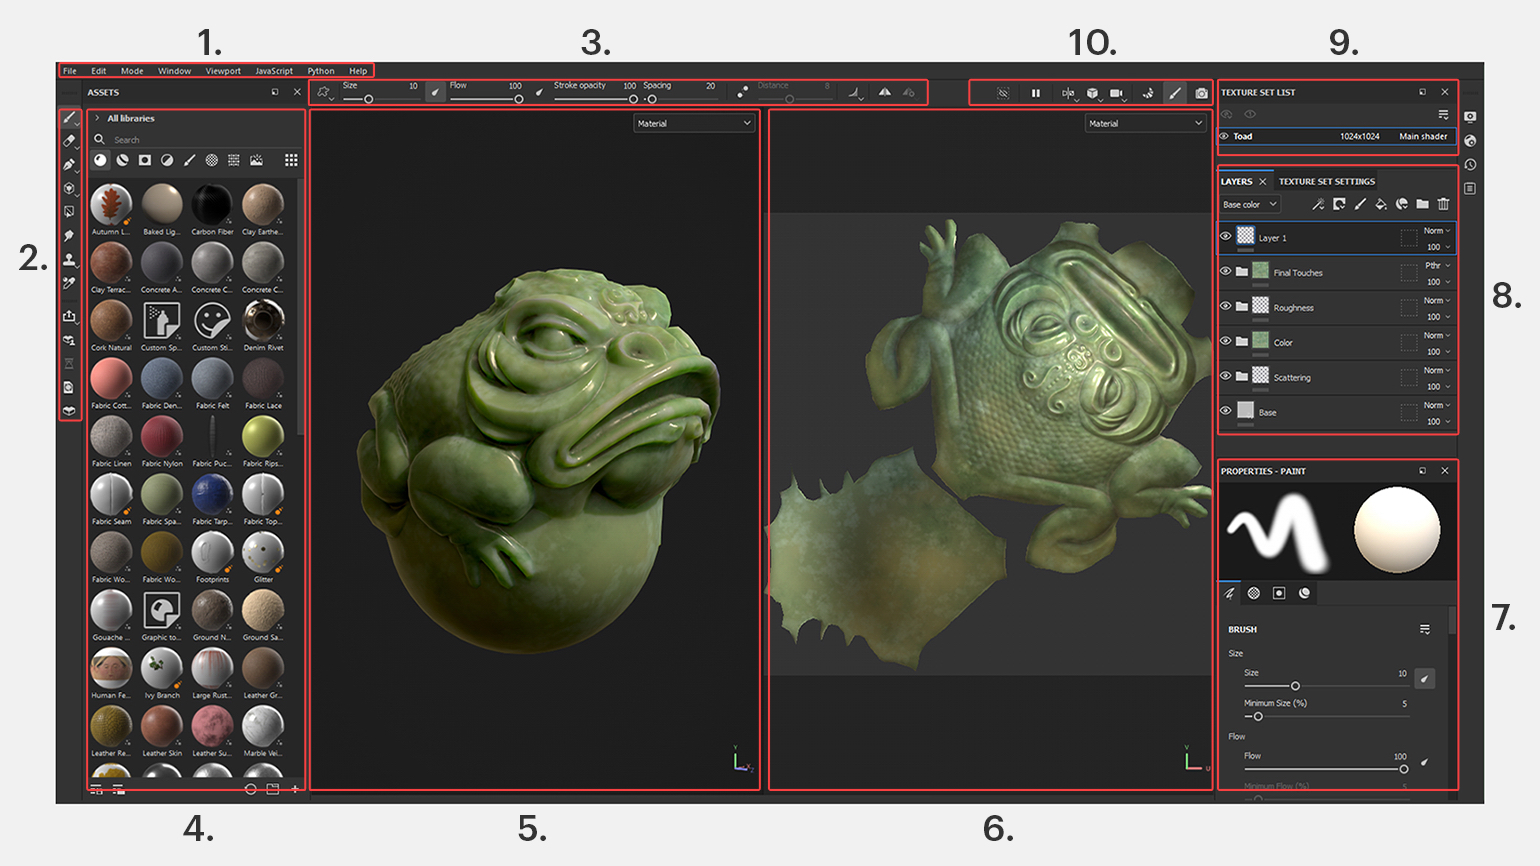
Substance 3D Painter is a program that enables real-time creation of sets of texture maps for 3D models. With it, artists can manually paint textures and immediately evaluate the results. Additionally, the program allows for the preparation of realistic PBR texture sets based on ready-made assets and gives them uniqueness by overlaying various layers and masks, including procedurally generated ones, and then baking them. In other words, Substance 3D Painter is like Photoshop, but for 3D artists. At the time of writing, the most current version of Substance 3D Painter is 9.1.2. Since the program is part of the Adobe ecosystem, this software can be obtained by subscribing to one of the packages listed below.
Adobe Substance 3D Collection - $49.99 per month. At first glance, the price may seem quite high, but for this amount, users can work not only in Substance 3D Painter but also in other programs of the Substance 3D ecosystem - Modeller (modeling), Sampler (photogrammetry), Designer (materials), Stager (visualizations), and Assets (asset library).
Adobe Substance 3D Texturing - $19.99 per month. This package is more suitable for those who work exclusively with textures. In addition to Substance 3D Painter, it includes Sampler, Designer, and Assets programs.
Another option is to purchase Substance 3D Painter on Steam, provided that a foreign region is specified in the account settings. For approximately $200 (the final price depends on the region), the user will receive a perpetual license with updates support for one year. However, to continue receiving updates in the following year, a new license will need to be purchased.
Key Features of the Program
Below is a list of some important texturing tasks that Substance 3D Painter successfully handles.
Layer and mask combination similar to graphic editors. Each layer has its own set of characteristics: color, height, roughness, normals, and other characteristics that can be adjusted in Properties or left as is. All layers can be hidden, displayed, sorted into separate folders for convenience, and also assigned a certain transparency value and blending mode. Depending on the layer hierarchy, completely different texture variations are obtained.
For example, if you drag the Ground Natural Mud asset onto the current frog model, the new layer will automatically take the top spot in the hierarchy. As a result, the previous texture will no longer be visible, as the new asset will overlay all previous layers. However, if you place the asset on top of an existing mask in the main Color texture folder, a completely different effect will be achieved.
By moving a specific asset between different layers and masks, you can get different results each time.
Drawing textures directly on the model in real time. Due to the visual representation of the 3D model in the viewport, the artist can draw or add accents directly on the mesh. This technique is ideal for various stylizations.
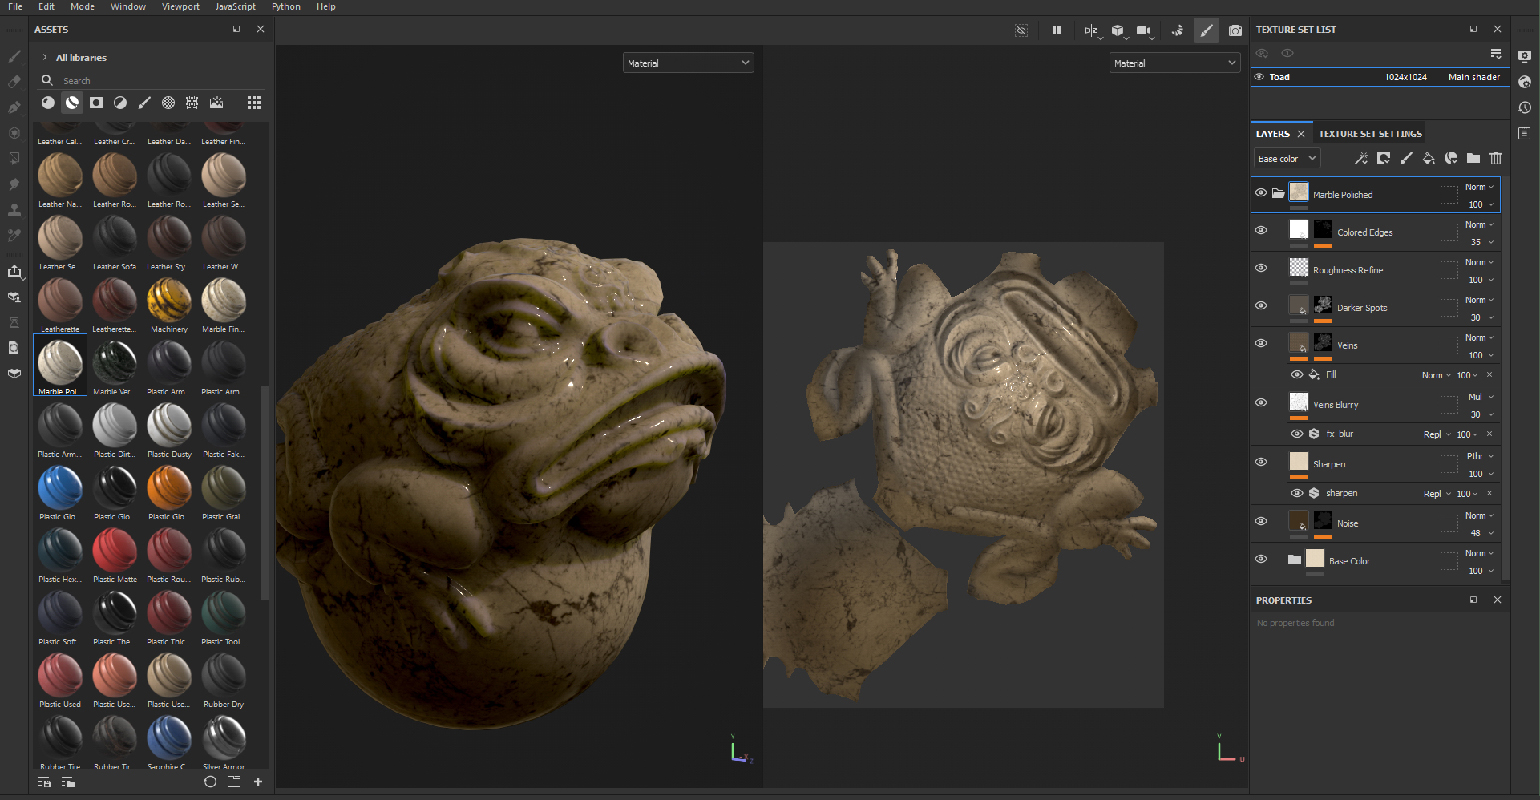
Creating PBR textures, including based on "smart" materials - ready-made templates created taking into account certain properties of physics. They can be used as is or modified by combining them with layers and masks as described above.
There is also a separate category of "smart" masks in the assets section, simulating various effects such as wear, dirt, rust, and more.
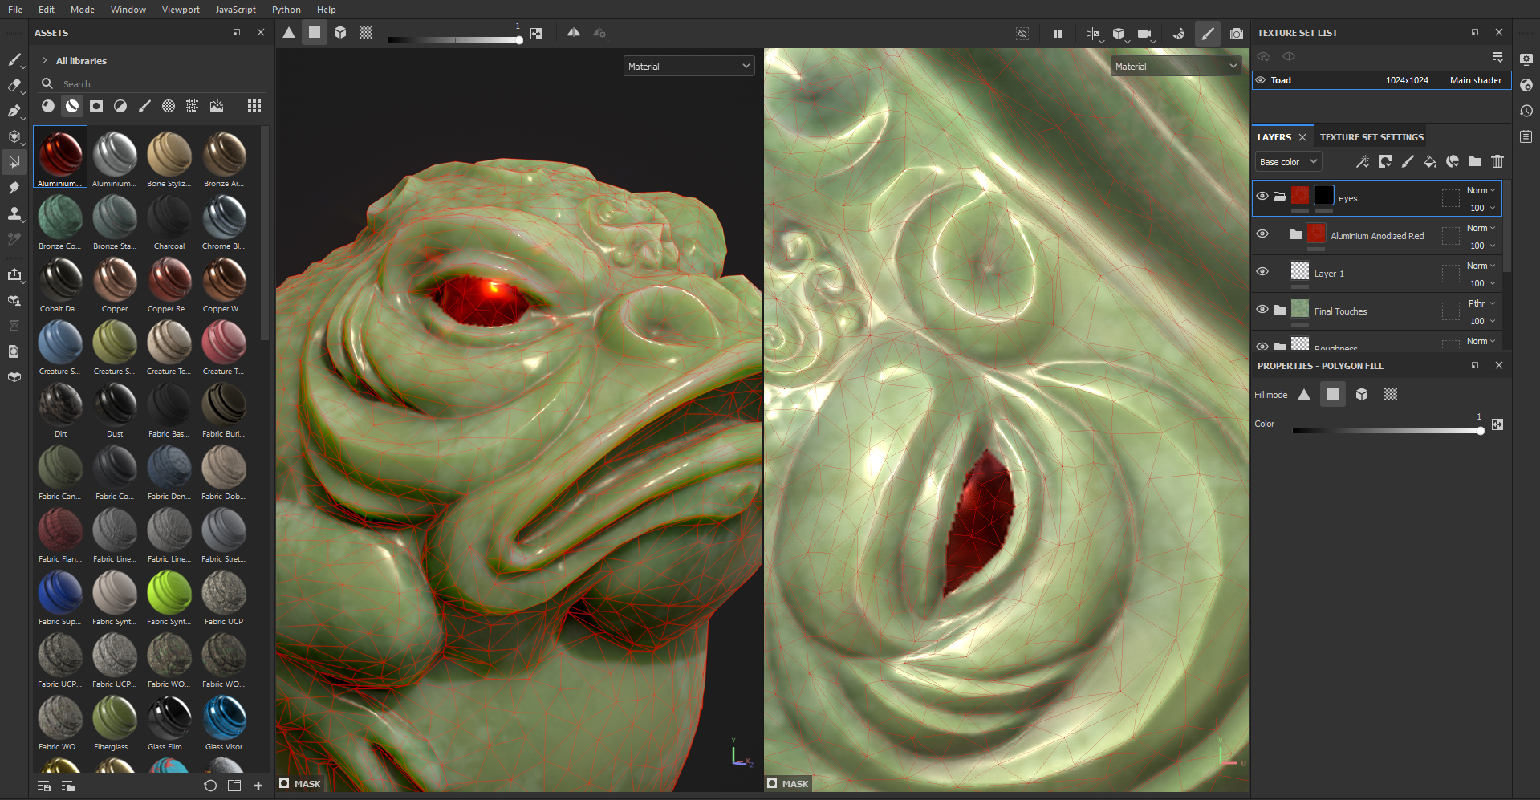
Applying layers and masks to individual parts of the mesh. This feature is often required to emphasize certain details, such as wear on a door handle or metal inserts. For such operations in Substance 3D Painter, there is a Polygon Fill tool, which can be found on the left toolbar.
For example, if you need to assign a different material to the frog's eye, create a new layer and folder. Move the layer to the new folder and create a new texture in it. In this case, we will simply move the "smart" material Aluminium Anodized Red. Click Add Mask (the icon with a circle in a square) and choose Add Black Mask (to select certain polygons). After that, you can select the necessary polygons on the mesh individually (Triangle Fill on the panel marked with the number 3) or as a whole area (Polygon Fill).
Different special effects that can be used both on the textures themselves and on masks. Most of them are based on blending methods and transparency. In particular, the category of effects includes generators - a separate category of masks that form the material based on the model's topology. To activate the generator, right-click on the selected layer and choose Add Generator. Then, in the options window, select the generator with the desired effect and adjust it to your liking.
For example, in the screenshot below, the 3D Linear Gradient generator, in conjunction with the "smart" material Bronze Armor, gave the upper part of the statuette a unique spray effect with saturated and smooth transitions.
A wide range of assets for creating additional relief. If you open the Textures category in the assets section, you can find a huge number of elements that can be used as additions to the existing normal map.
By combining such materials, you can add additional visual relief to low-poly models. This can be especially useful when modeling hard surfaces.


